NewEdge Unique ID Tool - User Guide
NewEdge Services UniqueID Tool User Guide
Designed to work seamlessly with your GIS database, the NewEdge Unique ID Tool generates custom unique IDs for GIS features. Features include: batch ID generation, automatic generate of new IDs for both new or split features, globally unique IDs across the database, easy modifications. The tool is Cityworks and E911 compatible as well.
Setup and Installation
A NewEdge representative will work with you to install the Unique ID Tool and walk you through the initial setup.
This may require you to create a new database admin account for use with the UniqueID Tool.

Logging In
Open the Tool (located in the NewEdge Services, Inc. application folder in Windows 8 and 10).
Login with the credentials provided.
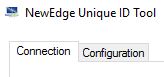
Configuration Tab
Once the connection is set, click on the Configuration Tab.
If requested, compress the database and reopen tool.
On the left are five buttons: Verify Setup, Save Setup,
Populate Feature IDs, Enable Auto ID, Disable SQL Trigger.
On the Right is a table with a row for each featureclass in the database.

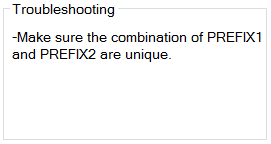
Make Corrections (if needed)
If it does not pass, correct the
information shown in red.
To get details about what needs to be fixed, hover the mouse over the highlighted cell. A message will appear in the 'Troubleshooting' window.
Click on Verify Setup again.
If the information passes all checks, Save Setup will turn from gray to black.

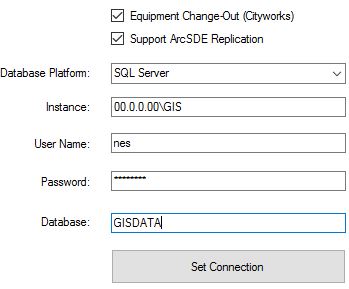
Set Connection
Go to the Connections tab.
Select the Database Platform.
Provide the Instance, User Name, Password, and Database.
Click Set Connection.
Save Setup
Click on the Save Setup button to save the information to your database.
Populate Feature IDs
To add unique IDs to existing features in the feature classes set to ENABLE using the information saved in the table,
click on Populate Feature IDs.
Enable Auto ID
To set the tool to automatically add unique IDs as features are added, split, or merged, click on Enable Auto ID.
The tool will continue to add unique IDs once the tool is closed.
It is recommended that users do not turn this off. If it needs to be turned off, click Disable Auto ID.


Verify Setup
Click the ENABLED checkbox next to the layers that need UniqueIDs.
Complete the following information for the selected feature classes
Click on the Verify Setup Button
If the information entered passes all checks, the Save Setup will turn from gray to black.
This step will need to be repeated every time changes are made on the configuration table.